
Do you want to search in all categories or in this category ?
It is pretty easy to setup LiteSpeed Cache with Cloudflare. I will give you step by step instructions on how you can do that. And also how you can use a free plugin as an alternative to Cloudflare APO. Though that plugin wouldn't give you all the same features of Cloudflare APO, it will give you enough to properly setup Cloudflare CDN with your WordPress site. But if you can spend $5/month, go with Cloudflare APO. I strongly recommend that.
This setup article is specifically for serving your entire WordPress site from Cloudflare CDN. Normally, Cloudflare only serves static files like CSS, JS, images, and other files but not HTML files as this is generally considered as dynamic file type. Serving dynamic files from CDN creates all sorts of problems if not set up properly. That's why Cloudflare doesn't automatically serve HTML files. But being able to also serve the dynamic HTML files from the CDN will give your site the fastest speed. Your website's TTFB will reduce significantly, and the total load time will also decrease.
Static file caching is automatically done from Cloudflare without requiring any special setups. That's why this article will be about properly setting up HTML file caching so that you can serve both static and dynamic files from Cloudflare CDN.
In order to use the CDN of Cloudflare, you will also need to use its DNS. So, let's start by setting up that.
First, go to dash.cloudflare.com then log into your account. If you don't have an account, create one for free and then log in.
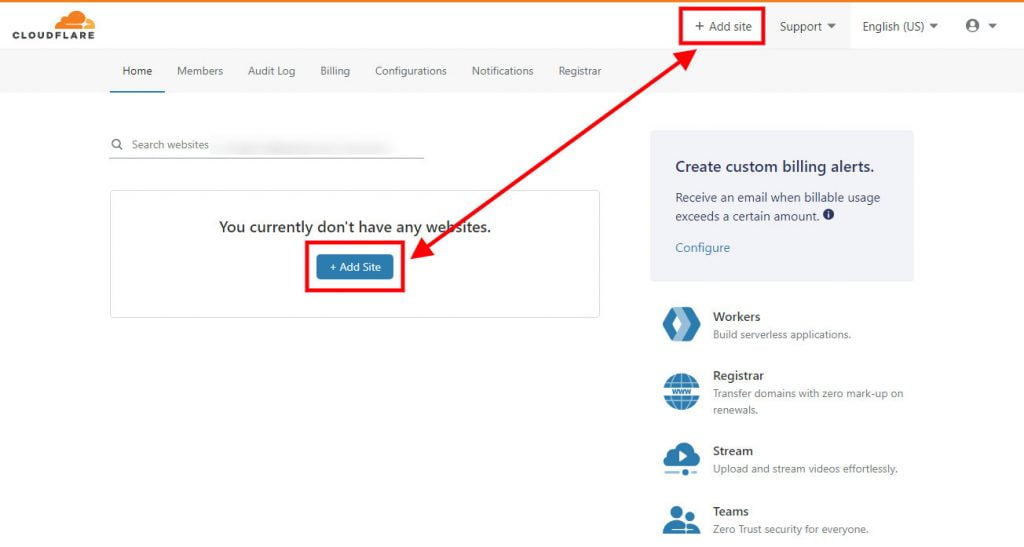
Now you will be inside the cloudflare dashboard. From here click on the + Add site bttuon.
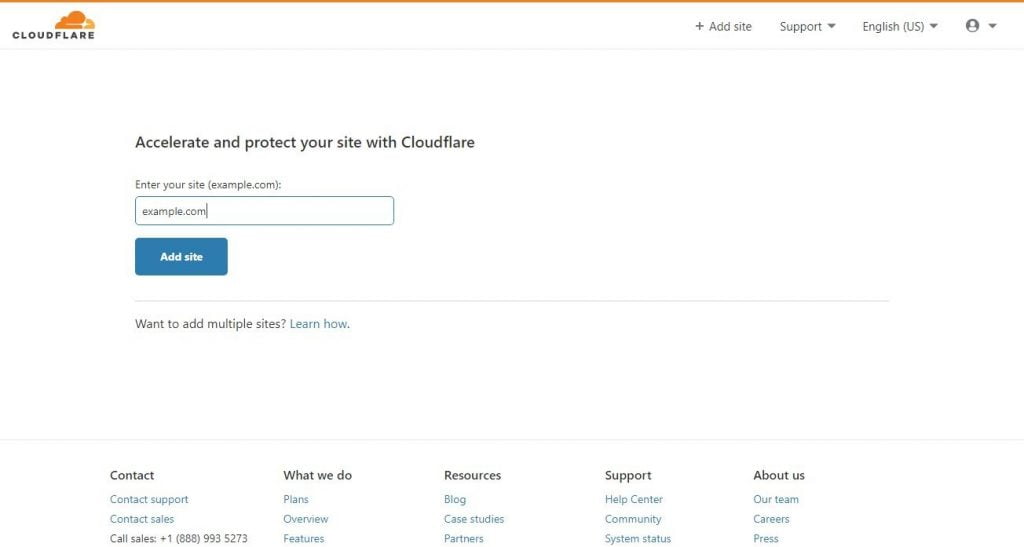
Then on the next page, enter your site in the specified format. Then click on Add site button.
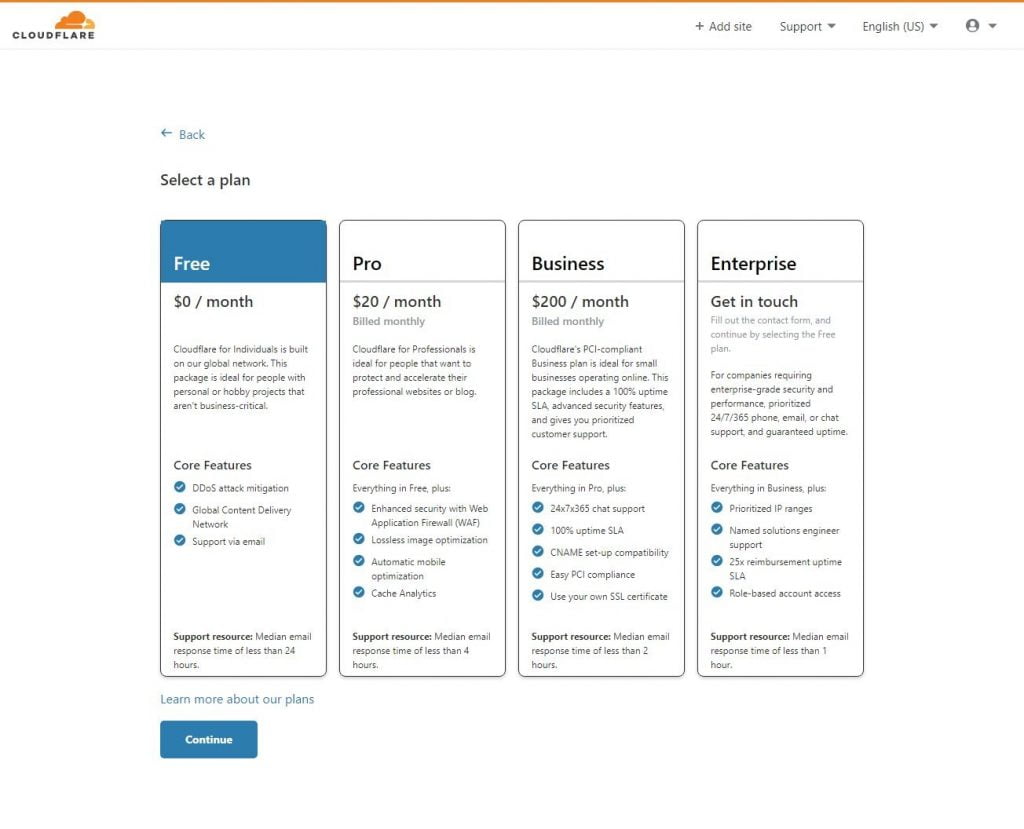
Then you will be prompted to choose a Cloudflare plan. Choose the Free plan from here then click on Choose.
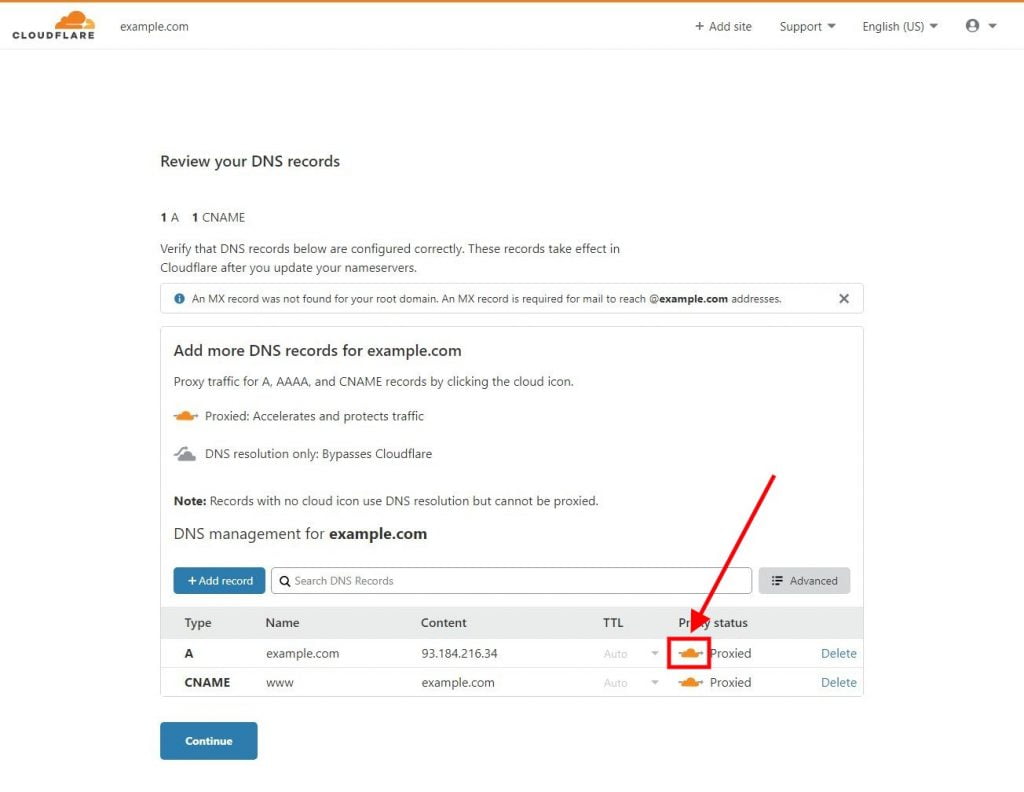
Now you will see the existing DNS records for that domain name. You can add, edit, delete any of the records from the page. But if your domain doesn't have any existing DNS records, you won't see any records here.
From this page, make sure your domain has an A record pointing to the IP address of your web server. You will get this IP address from your web hosting provider. If you use a subdomain like www.example.com to access your site, you will also need to have an A record or CNAME record for that subdomain. These records will help access your site. But if these records don't already exist, you will be able to add them from this page using the + Add record button. And don't worry, you can always change these records later.
However, make sure that the cloud icon for your domain name is orange instead of gray. This is a must in order to use Cloudflare's CDN with your site. Then click on Continue.
Then the next page will show your existing nameserver records and the two nameserver records for your Cloudflare account. What you will need to do is replace those existing records with your Cloudflare records.
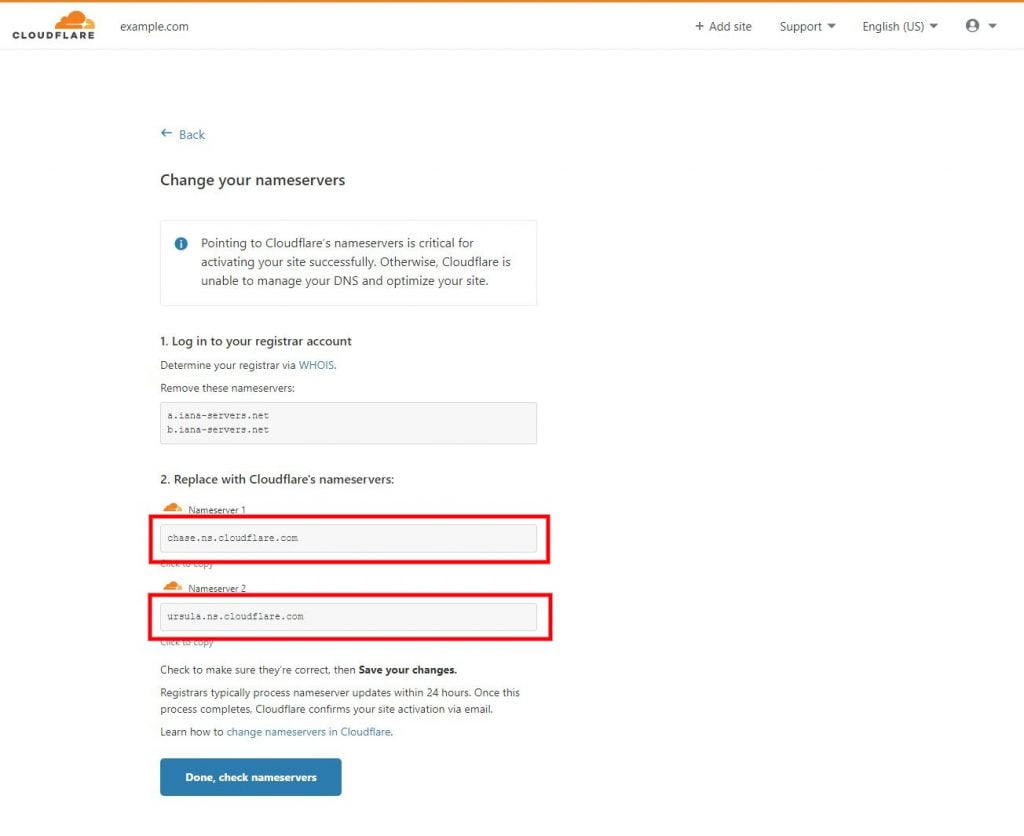
In order to change the nameserver records of your domain, first you will need to go to your domain registrar's website then change the nameservers from there. So, go to the website of the provider from whom you have bought your domain name like NameCheap, Godaddy, or anyone else. Then log into your account and change the nameserver records of the domain you want to use with Cloudflare.
This article by Cloudflare about changing domain nameservers to Cloudflare will help you in doing that. Just click on the name of your domain registrar and you will see step by step instructions about how to change nameservers from that registrar. But if you don't see your domain registrar's name, you will need to find out how to do it there.
When you are done with that, come back to the Cloudflare's page where you left off and click on the Done, check nameservers button.
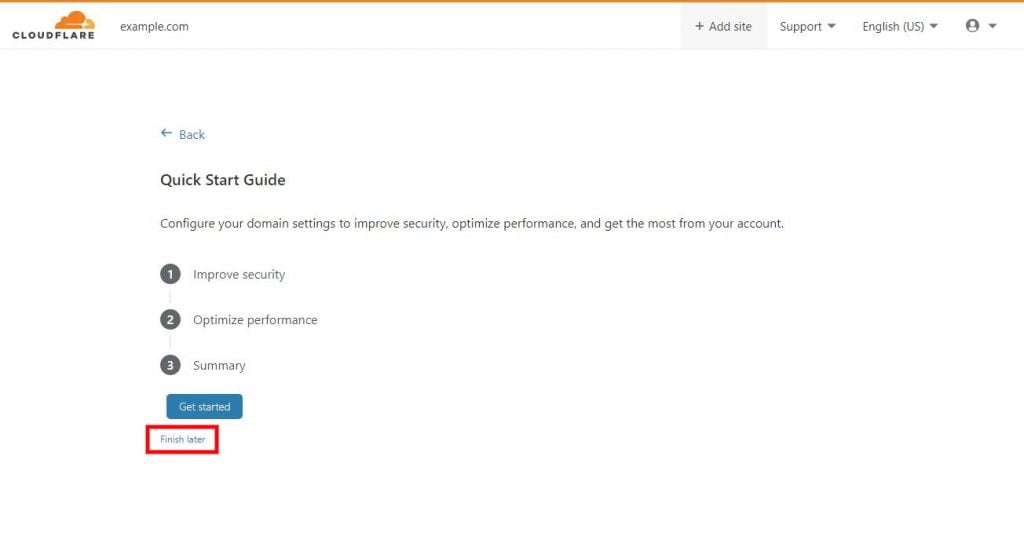
Then on the Quick Start Guide page, click on Finish later as you will be able to change all the settings later.
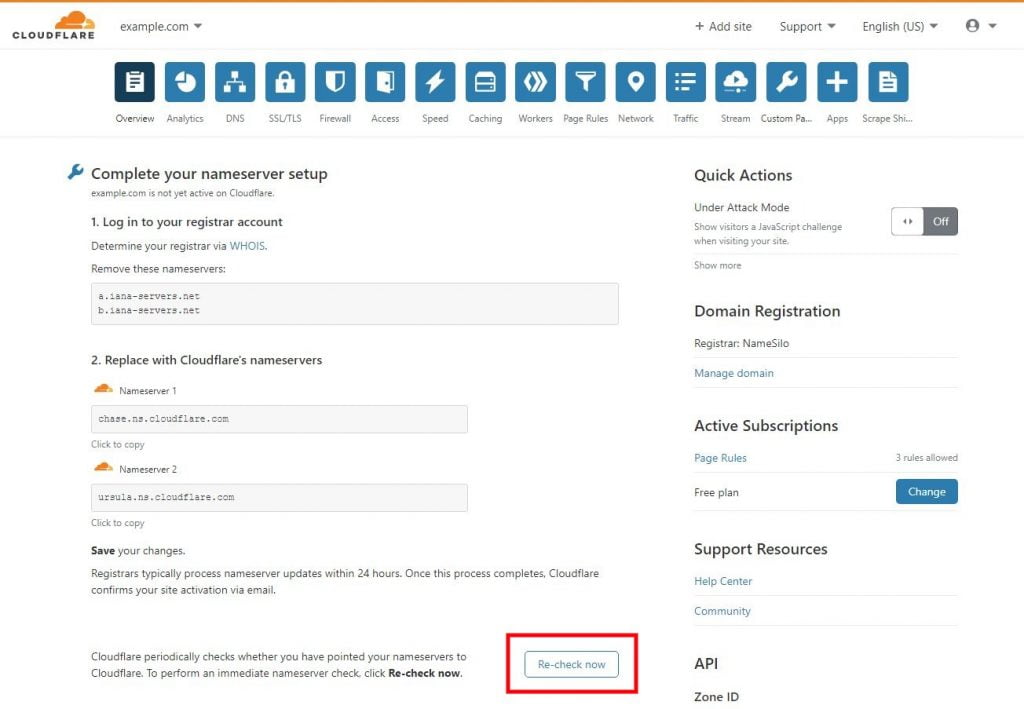
Then you will see the complete your nameserver setup page. This page is shown because it may take a while for Cloudflare to see your updated nameserver records. You can click on the Re-check now button to add your domain to the queue of Cloudflare.
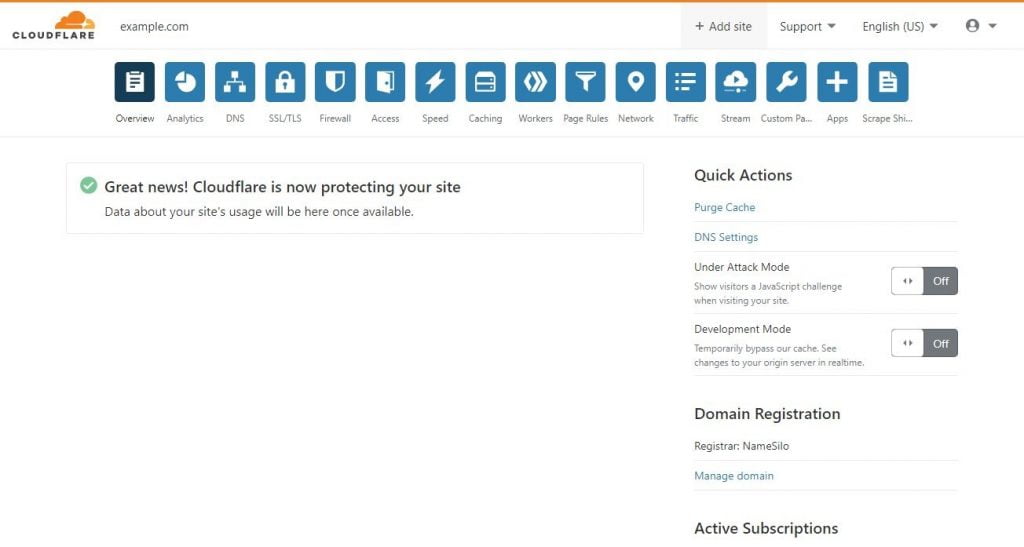
Though it will tell you to check back in a few hours, the nameserver records are generally verified within minutes. So, to check if your domain name has been verified, refresh the page. But if you have left the page, open the Overview page from Cloudflare dashboard. Once it is verified, you will see it on the page like the following:
Now go to the dashboard of your WordPress site for which you just setup Cloudflare DNS. Then install and activate LiteSpeed cache plugin if you haven't already done that.
Now from the WordPress dashboard, go to LiteSpeed Cache > CDN > CDN Settings. Then scroll down to the Cloudflare API section.
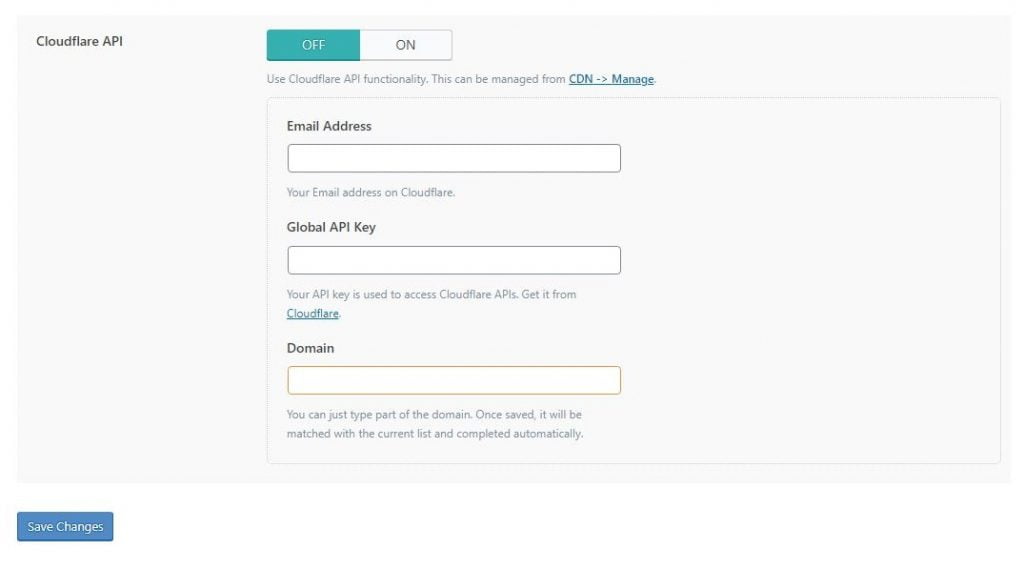
Here, in the Email Address field, enter the email address which you have used in your Cloudflare account. Then in the Domain field, enter the domain name of the website you are currently on. Then for the Global API Key field, you will need to go to your Cloudflare account.
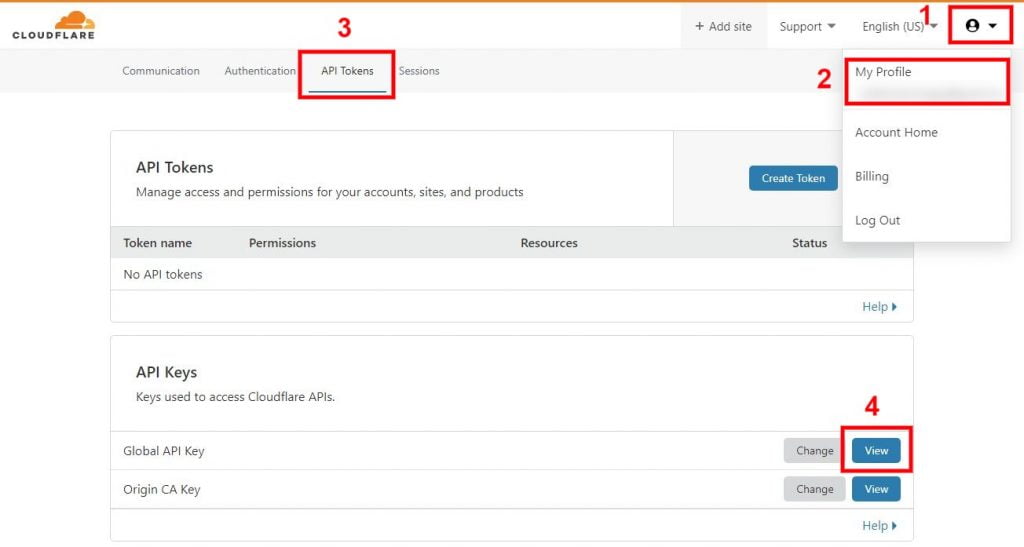
So, go to dash.cloudflare.com and log into your account. There, click on your profile icon then My Profile > API Tokens. Now to see get your Global API Key, click on the View button for Global API Key. Then you will be prompted to enter your password and after that, you will get the key. Copy that key to use in the LiteSpeed Cache plugin.
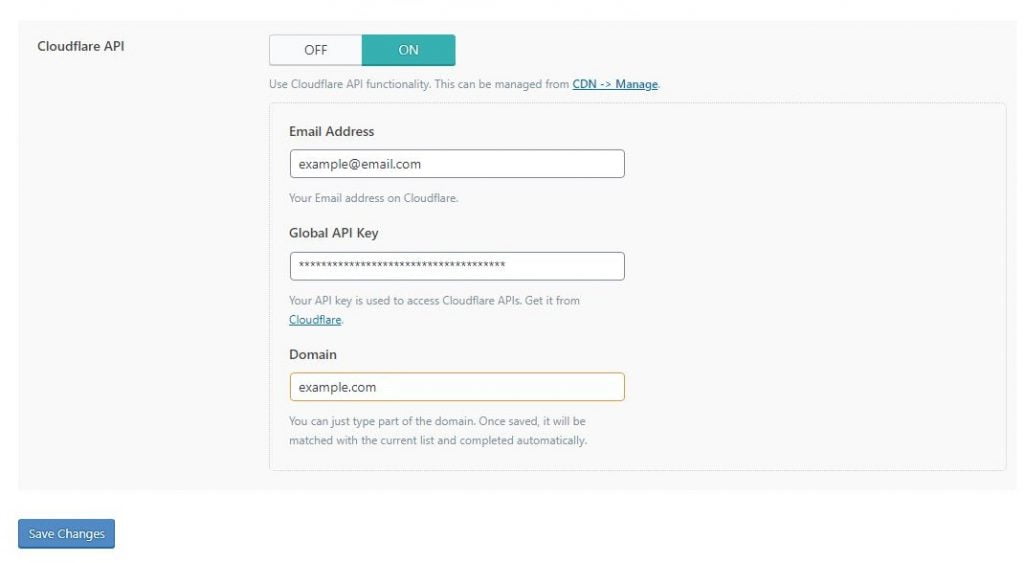
Now paste your Global API Key in the LiteSpeed Cache plugins' settings page where you left off. Then turn ON the button beside the Cloudflare API option. Then Click on Save Changes from the page.
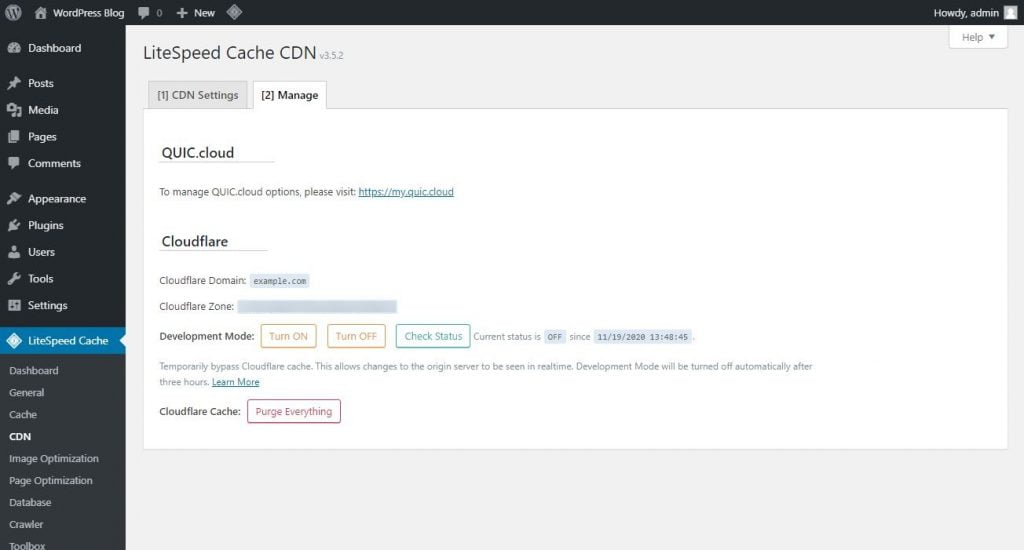
Now that you have saved your Cloudflare information, if you go to the Manage tab from this page, you will see your associated Cloudflare Domain name, Zone, Development Mode options, and Purge Everything button for Cloudflare cache.
Remember to setup your LiteSpeed Cache settings according to your need. Because the LiteSpeed Cache plugin settings won't affect how caching work on Cloudflare CDN, I am not including it in this article. But you can use this LiteSpeed Cache settings guide for that.
When you add Cloudflare API to LiteSpeed Cache, it will give you option to manually clear all cache from Cloudflare, and to enable Development Mode of Cloudflare from your WordPress dashboard. However, that's pretty much all the benefit you are going to get from this. So, when you update any page, post, or do any kind of changes in WordPress, LiteSpeed Cache isn't going to notify that to Cloudflare.
Therefore, the HTML cache in Cloudflare won't be automatically removed and so your visitors will end up seeing stale contents when you are serving HTML files from Cloudflare CDN. That's just the beginning of the problems. Your visitors may see what you see on your site as a logged-in user. For instance, they may see the admin bar, customization options, and other things that you see when logged in as an admin. Additionally, you may end up not seeing these options even when you are logged in.
Apart from these, Cloudflare will cache pages with dynamic contents, aka pages that shouldn't be cached. This will result in visitors seeing wrong contents like seeing contents that aren't intended for them but for some other visitors.
All these problems will occur because of wrong dynamic caching setup in Cloudflare CDN. So we will need to fix that problem now.
You know what you can just turn off the Cloudflare API option from the LIteSpeed Cache > CDN > CDN Settings page because keeping it on won't give any real benefit as discussed above. Then follow the next sections to setup Cloudflare CDN properly with your WordPress site.


Premium Managed Wordpress hosting